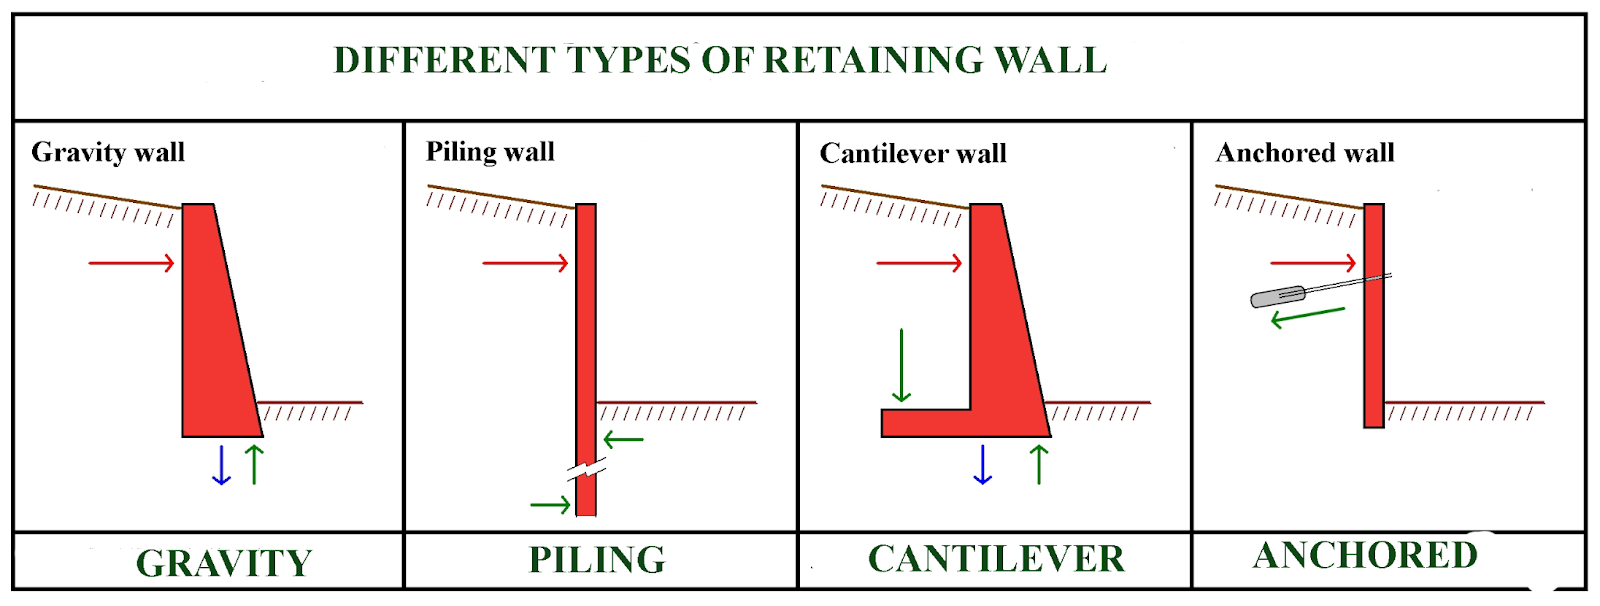
Building a retaining wall is a great way to add structure and function to your landscape. In this step-by-step guide, we’ll show you how to excavate the area, add gravel and base rock, and then lay the retaining wall blocks to create a sturdy wall that will last for years.
The first step: excavating the area.
Measuring the area
Before you begin excavating, it is important to measure the area where the retaining wall will be built. This will ensure that you have enough space for the wall and that the wall will be the correct size. To measure the area, use a tape measure or a measuring wheel.
Excavating the area
Once you have measured the area, you can start excavating. If you are using a shovel, dig a trench that is about one foot wide and two feet deep. If you are using an excavator, dig a trench that is about two feet wide and four feet deep. Be sure to remove any large rocks or roots from the trench.
The second step: adding gravel and base rock.
Adding gravel
Gravel is an important part of building a retaining wall because it provides drainage behind the wall. Without proper drainage, water can build up and cause the wall to collapse. To add gravel, first excavate a trench behind the wall that is about twice as wide as the wall itself. Then, fill the trench with gravel and compact it using a hand tamper or plate compactor.
Adding base rock
After adding the gravel, you will need to add a layer of base rock. This helps to further improve drainage and also provides a solid foundation for the retaining wall blocks. To do this, simply spread a layer of base rock over the gravel and compact it using a hand tamper or plate compactor.
The third step: adding the retaining wall blocks.
Laying the first course of blocks
The first course of blocks is the most important, as it will set the foundation for the rest of the wall. Begin by leveling off the ground where the first course will be laid. This can be done with a hand level or a laser level. Once the ground is level, lay your first course of blocks on top of the gravel and base rock, using a mason’s line to make sure they are straight. You may want to use mortar to set the first course in place, but it is not necessary.
Laying the second course of blocks
After the first course is in place, begin working on the second course. Again, start by leveling off the ground and then laying your blocks. If you are using mortar, be sure to offset each block so that the joints do not line up with those on the first course.
Laying the third course of blocks
The third and final course is laid just like the second, except that you will need to cut some of the blocks to fit against The wall should now be complete!
To finish, backfill the area behind the wall with dirt and tamp it down. This will help to stabilize the wall.
The fourth step: backfilling and tamping.
Backfilling the area behind the wall
Once you have laid all of your retaining wall blocks, it is time to backfill the area behind the wall. This will help to support the wall and keep it in place. Use a shovel to fill in the area with soil, making sure to pack it down as you go.
Tamping the backfill
After you have backfilled the area, use a tamper or other tool to compact the soil. This will help to ensure that your wall is stable and will not move over time.
Building a retaining wall is a great way to add structure and support to your landscaping. Retaining walls can be built with a variety of materials, including concrete, stone, and brick. When choosing a material for your retaining wall, be sure to consider the weight of the material, as well as the climate in which it will be installed. If you live in an area with a lot of rainfall, for example, you’ll want to choose a material that won’t be susceptible to rot or mold.
Because underpinning is a delicate repair job, we need to be sure that we choose the appropriate approach for it. Understanding and evaluating the soil strata, the present state, and any difficulties that pertain to the whole foundation, as well as determining the needed depth and the length of the new foundation, are all necessary steps for the right procedure.
To put it another way, underpinning is a method of foundation restoration that allows for the transfer of an existing bearing label roll to a new level at a shallower depth. This is done to protect the structure from becoming more fragile. The underpinning method may also be used as a substitute for the foundation.
Building a retaining wall is a bit of a project, but it’s definitely doable for the average homeowner. If you’re not comfortable tackling the project yourself, there’s no shame in hiring a professional to help you out. Either way, a retaining wall is a great addition to any landscaping plan.
Conclusion
After following the steps in this guide, your retaining wall will be built and ready to provide years of function and beauty. Take pride in knowing that you completed the project yourself, and enjoy the satisfaction of a job well done.

